Jabra PRO 9450, 9460, 9465, 9470 Wireless Headsets for your HF Radio
After having so much success with my original Jabra A-210 and VXI Bluetooth Headset, I decided to upgrade to the Jabra PRO 9450 - Dual, also made by GN Netcom. After suffering a sudden hearing loss I needed a headset that had dual earpieces. Although these headsets are normally expensive, they can sometimes be found on EBay for a reasonable price (~$100 USD). The 9450 and 9460 versions of this headset are very similar, and the info below could be used to help setup either model headset.
The Jabra 9450 Pro, 9460, 9465, and 9470 headsets have several advantages over the original VXI Bluetooth system, that I originally started with. It includes both the headset and mating base unit; has a much greater range (1000 Feet), longer headset battery life, and the headset recharging cradle is part of the base unit, which is powered by a wall wart. When you are not using the headset, you simply place it in the cradle on top of the base unit, which keeps it charged, and ready for your next use.
Interfacing it to your HF radio is also very simple. There is a 4-Pin modular connector on the back of the 9450 base unit that accepts a RJ22 4P4C handset modular connector. This connector is smaller than other RJ connectors, and sometimes hard to find. They are used with telephone handsets. You will need to locate one of these for this project.
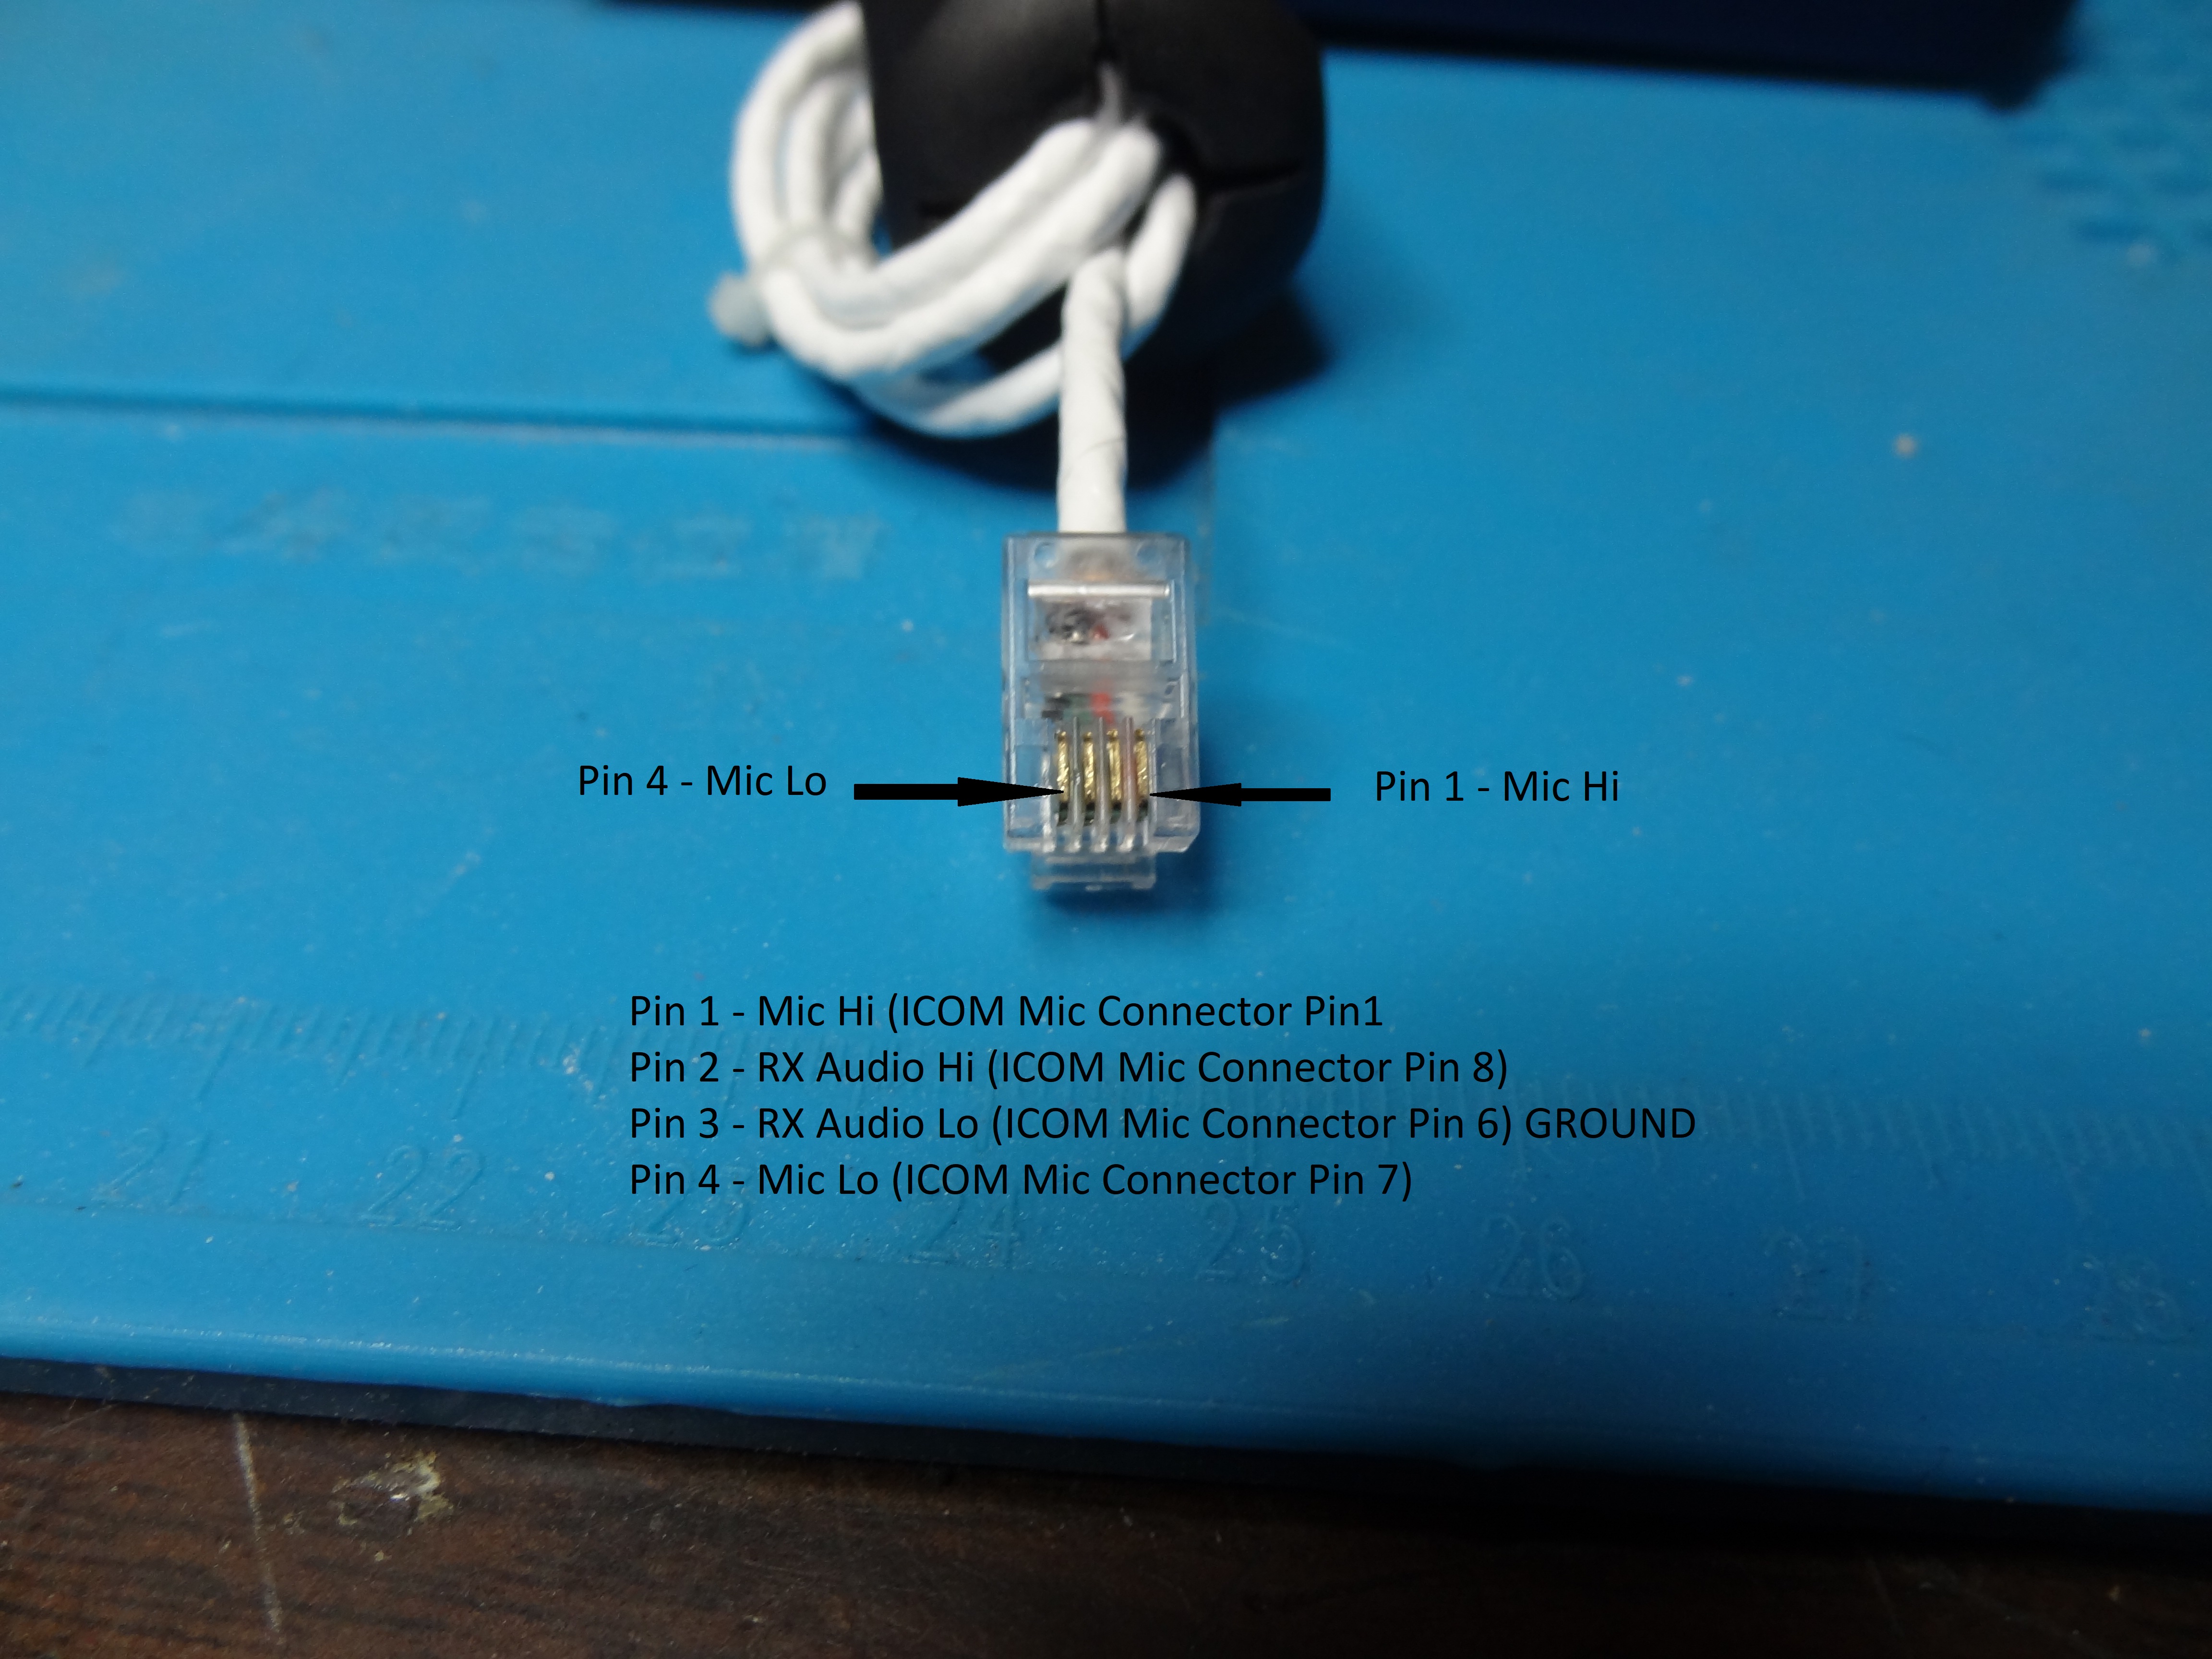
The inner two conductors in the 4P4C connector connect to your radio's RX audio, and the two outer wires connect to your radio's radio's Mic input. I wired my 4P4C connector starting at Pin 1, from RIGHT to LEFT as Mic Hi - RX Audio Hi - RX Audio Lo/Gnd - Mic Lo.
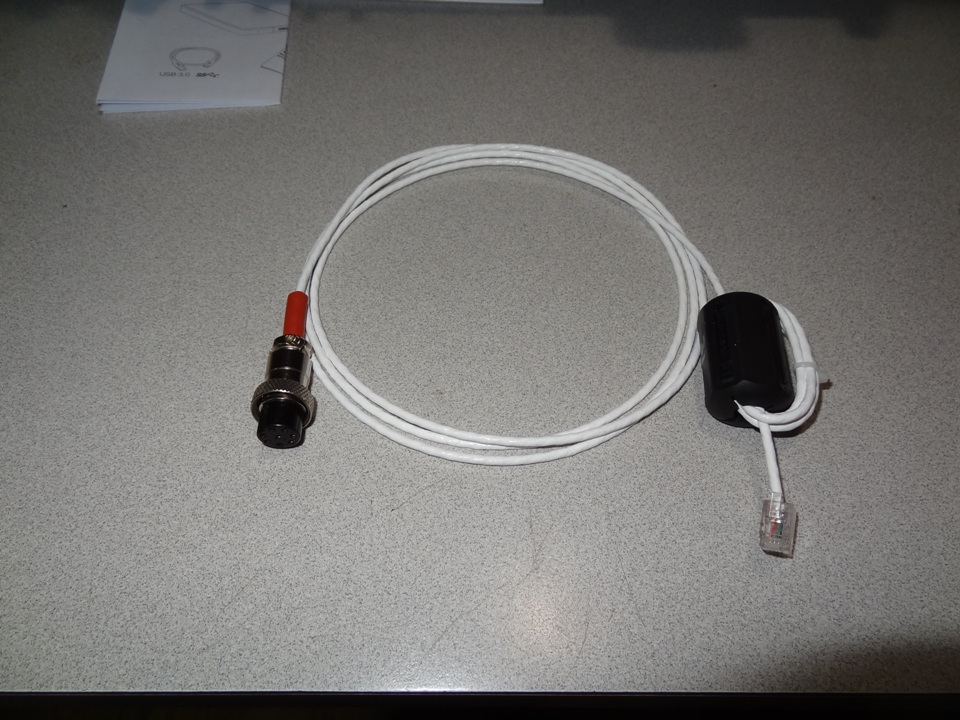
To start with, I used a 6 foot length of 4-conductor flat telephone cable, with a crimped RJ22 4P4C modular connector at one end, and a standard ICOM 8-pin microphone connector at the other end. If you are using an ICOM radio that has the standard 8-Pin Mic connector, the inner two conductors of the flat cable connect between pin-8 (RX audio) & pin-6 (Ground). The outer two conductors connect between pin-1 (Mic Hi) & pin-7 (Mic Ground). When viewing the RJ-22/4P4C Modular connector with the "flat" side facing down; The 4P4C connector pins count 1 thru 4, RIGHT to LEFT (See Last Picture Below)
-
ICOM Microphone Connector Pin 1 (MIC HI) ----------------------------------> RJ22 Pin 1
-
ICOM Microphone Connector Pin 8 (RX AUDIO HI)--------------------------->RJ-22 Pin 2
-
ICOM Microphone Connector Pin 6 (RX AUDIO LO & GND)----------------->RJ-22 Pin 3
-
ICOM Microphone Connector Pin 7 ( MIC LO)--------------------------------->RJ-22 Pin 4
I believe ICOM is one the only radio manufacturer's that provides RX Audio at the Microphone connector.
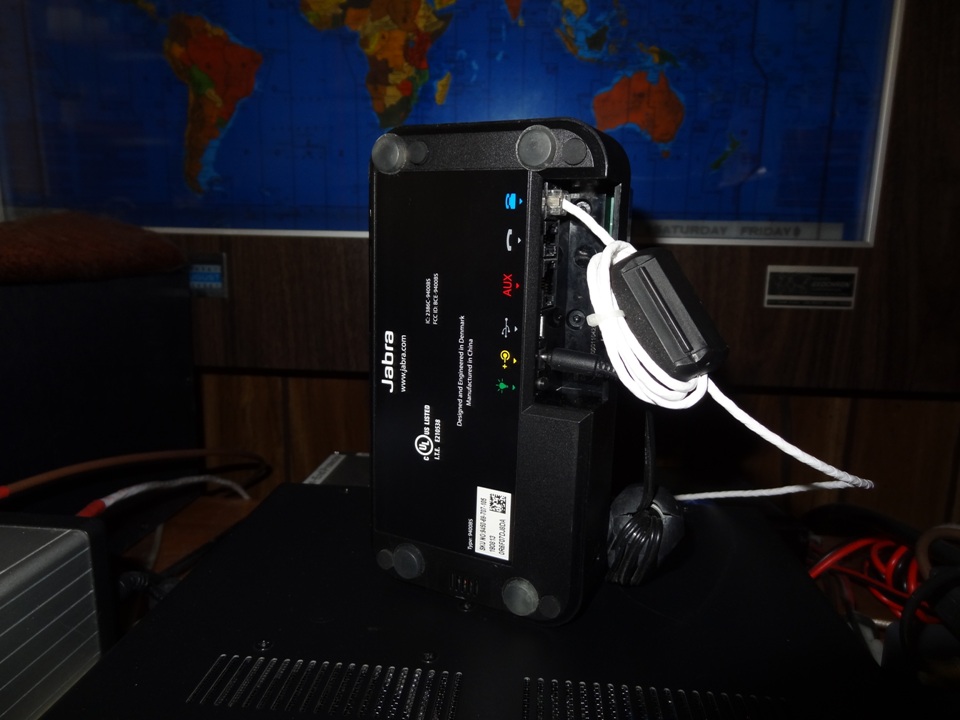
If you are attempting to interface this headset with a different manufacturer's radio (ie; Kenwood, Yaesu, etc), you will probably need to "break out" the RX audio leads and obtain the audio from a nearby headphone jack. You might also be able to interface the 9450's base unit with the accessory audio connections on the back of your radio, but be cautious since VOX operation might only be permitted thru the front panel Accessory connector. The 8-pin Mic connectors are readily available at most locations. Should you experience any RF feedback, wind several turns of the flat telephone cable and Wall Wart power cable around a Mix-31 snap-on ferrite bead near the back of the 9450's base unit. (See Picture)
As an added Bonus, you can connect a mini-USB cable between the 9450 Base Unit and your PC. This allows the Jabra 9450 to also be used with your computer programs like "SKYPE" and other programs requiring an audio interface. There are flat buttons on either side of the front part of the 9450's base unit. These buttons allow the user to switch back and forth between the USB and 4-Wire Analog outputs of the Jabra 9450.
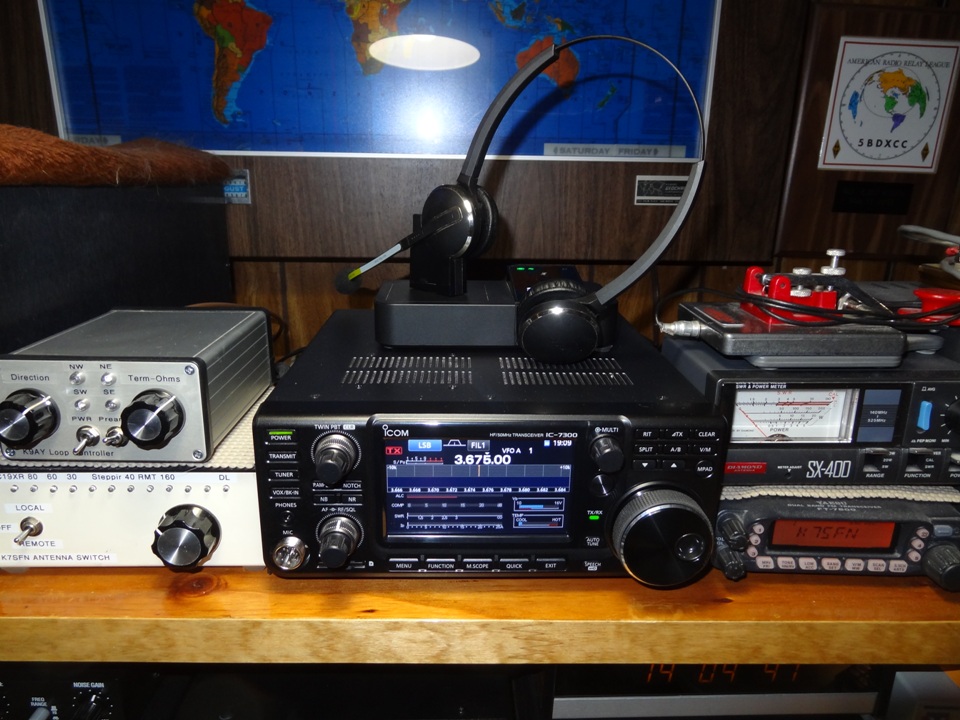
Jabra 9450 PRO with headset docked in charging Cradle.
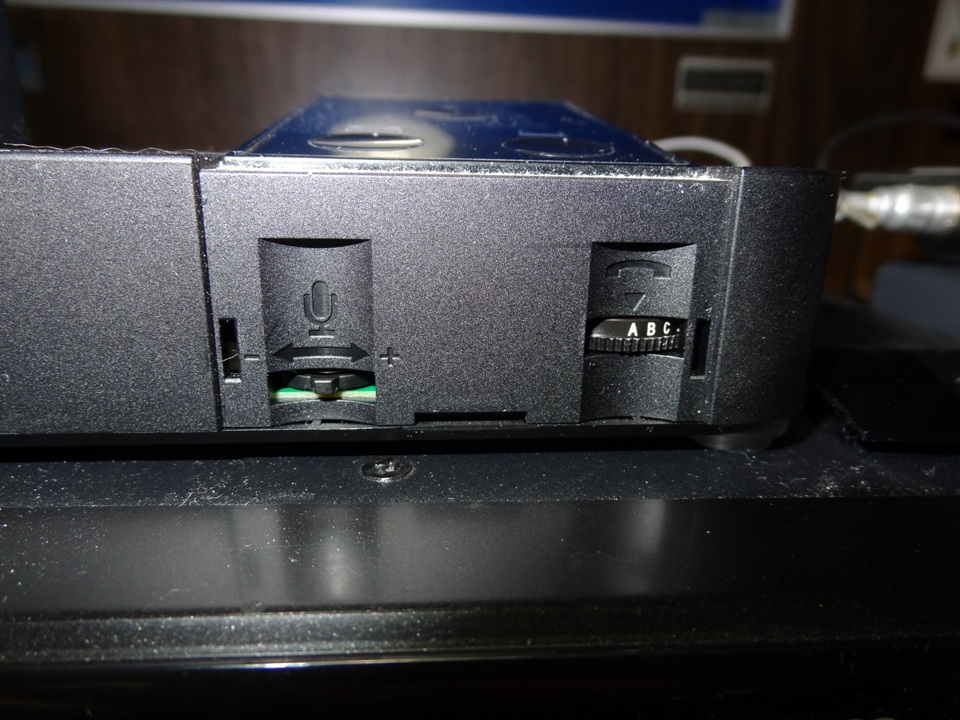
Jabra 9450 Pro Base Unit "Clear Dial Tone" Switch, and TX Microphone Level Adjustment (Front Cover Removed).
Jabra 9450 Base Unit showing the rear wall wart power connection, 4P4C modular connector & cable going towards the rig. (31-MIX Ferrite Snap Beads)
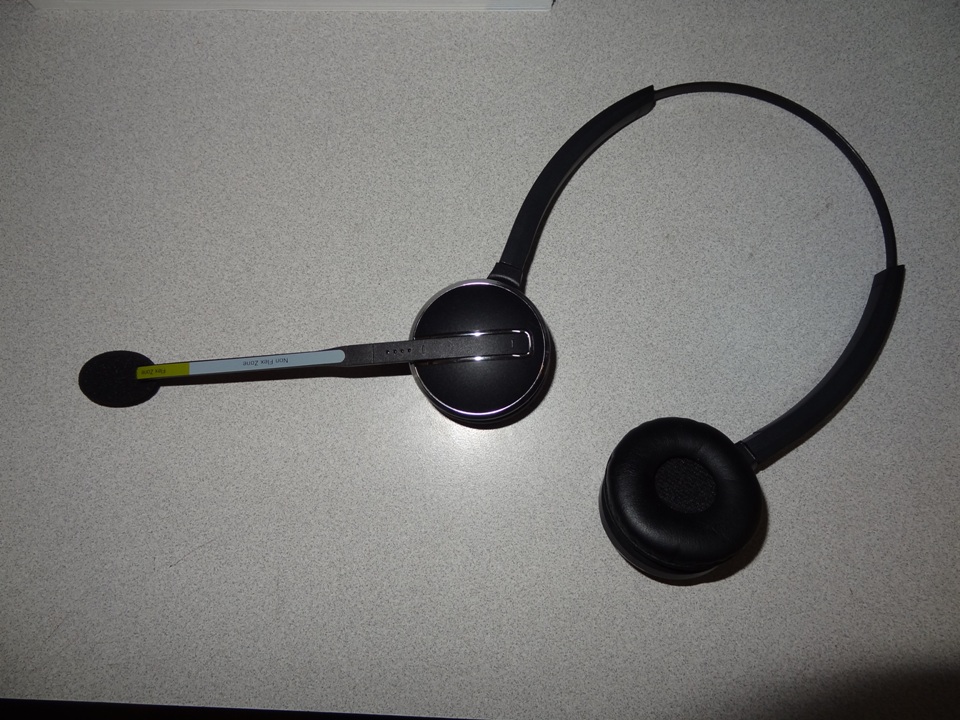
Jabra 9450 Dual Earpiece Headset. (Comfortable and nicely made)
Closeup of Icom Mic Cable Showing RJ22 Modular connector and wire color connections I used. (Works for all ICOM Radios with 8-Pin MIc Connector)
JABRA 9450 /9460 4P4C Modular Connector Pin-out
The Jabra 9450/9460 Headsets use a software program to set some of the options. This program is a free download from the Jabra website.
On the later Jabra Headsets, I suggest you download the "Jabra Direct" Program, and configure the headset options using Jabra's Software.
I recently tested the Jabra Engage 65 and 75 Headsets, which are updated versions tf the older Jabra 9400 Series
They are presently more expensive and I did not see any significant improvement over the 9400 Series.